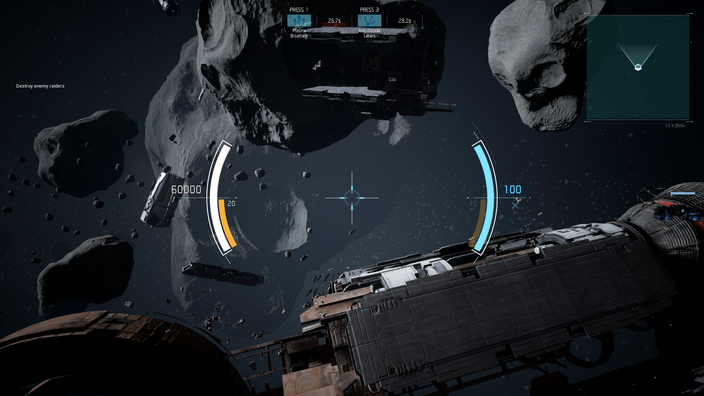
UI refers to the User Interface, and is what we see on the screen while playing. It differs from the Interface in which the interface is used only on the top level menus and navigation, and not in-game.
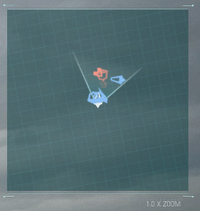
The UI can be separated in several parts. On the picture above, one can see several parts. On the top of the screen sit the Modules . On the upper-right corner, the minimap. On the very center, the crosshairs, and surrounding it you Health bar (rightmost one), your Energy (the leftmost one) and the number of rounds in each Weapons (the smaller, yellow bars inside the reticule).
The Modules Section[]

Module with Lock-On
This image on the right, however, has a green tint to one of the Modules. That is because this one has a Lock-On to some other ship, meaning that firing that Module will make sure all missiles will track the other ship. If it was a Warp Jump, for example, you'd warp right to its side.
The Minimap[]

Minimap w/ enemies & friendliey
The minimap is a very important part of the UI. It shows your current position and Field of View (FOV) and the friendly and enemy ships on the vincinity. The FOV is demarked by the two lines coming out of your ship, friendly ships are blue and enemies are red.
The minimap plays a very important role in spotting and moving in on enemy ships. It shows Corvettes and Artillery Cruisers if they're not Cloaked, and that alone will save your life, if you can spot them before they spring thier trap on you.
Previously, in Alpha, it was possible to change the zoom and make it so that you could either see the ships near you in a more spread-out manner, or see almost the entire battlefield. As of CBT, it is no longer possible to change the zoom.
The Reticule[]
Located at the center of the screen, the reticule shows an array of very important information, besides the obvious crosshair and lateral bars.
Crosshair[]

Crosshair resting

Crosshair aimed
First, we have the crosshair. It will be blue when not aiming at a target, red when the range is optimal and yellow/orange when the range is too far/not good. When aiming at something, however, the crosshair changes and displays another set of information. First, it shows the range in the form of coloring. It will turn red if the range is optimal, and yellow if not. Furthermore, it shows the target's current health (red bar) and Energy (blue bar) above it. On the right side of these bars, the actual Energy flow will be displayed. If it's a little 'x', there is no flow. In addition, the Modules with lock-on will turn green.
Lateral Bars[]

Left Lateral Bars

Right Lateral Bars
The lateral bars display the current Health, Energy (and its Flow Status) and ammo on both primary and secondary Weapons.
To the right are the current Energy, the Flow Status (denoted by the little 'x' under the '100') and on the inner side, the current ammo for the Secondary Weapon , displayed in the form of a yellow half-bar. The little '15' is the current ammo. Not that the color is a little muted and more orange than yellow. That means this Weapon is NOT active.
On the left side sit the current Health and the current ammo for the primary Weapon. Note that the inner bar is the ammo bar, and it is a bright yellow. This denotes that THIS is the active Weapon .


